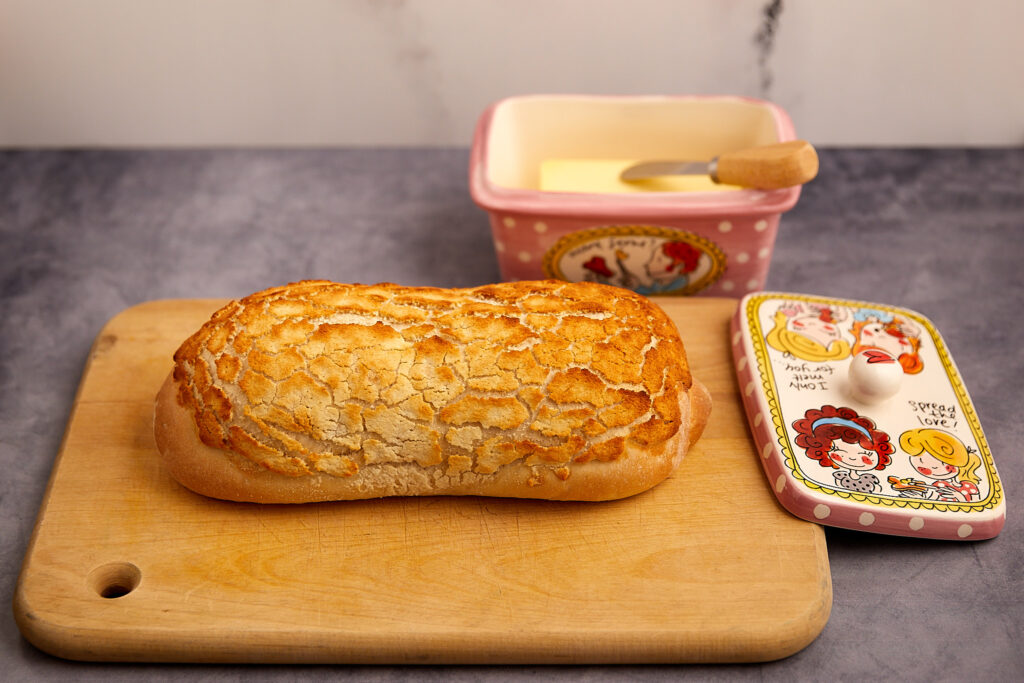
When I moved to the United States, I really missed the freshly baked artisan loaves of bread that we used to get from the local bakeries. This bread, “Tijgerbrood” (literally translated Tiger Bread), has a characteristic crust with a tiger, or leopard pattern on it! This crust adds a ton of crunch to the bread, which is why another name I have seen for this bread is Dutch Crunch Bread. I still remember that on vacation, my dad would ride his bike to a baker in town (30 minutes each way), and bring this bread with him. Still warm, we’d simply eat it with butter, sometimes some sugar.

Dutch Tijgerbrood: Dutch Tiger Bread / Dutch Crunch Bread
Learn how to make Tijgerbrood, or Dutch Tiger Bread: delicious white bread with a crunchy top that resembles the pattern on a tiger, or leopard. Because the crust has so much crunch, it's often called Dutch Crunch Bread as well.
Ingredients
Method
Preparation
- Let the butter get to room temperature, so it's nice and soft.
- Warm the water until it's 43ºC (110F).
Make the dough
- In a standmixer with the dough-hook attached, add all the dy ingredients for the bread:
- Flour
- Yeast
- Salt
- Butter
- With the mixer going, slowly add the water. Let the mixer run until the dough comes together to forms a ball.You may have to add a little bit of water, and you'll definitely have to scrape the bowl down from time to time.
- Once the dough forms a ball, let the mixer knead it for 10 minutes.
First Rise
- Once the dough has been kneaded, cut it into two even pieces.
- Form a ball of each piece, making sure you create a good amount of tension on the skin. You can watch the video on how I make the dough balls.
- Put the dough balls, seam down, on a cookie sheet. Cover with a towel, and let it rise for 30 minutes in a warm spot.
Make the Rice Paste / Porridge
- In a bowl, mix all the ingredients for the rice paste, until it's fully combined.
- Cover with plastic wrap, and put it in a warm spot to rise, until you're ready to bake the bread.
Second Rise of the Dough
- After the first rise, flatten the two dough balls, and roll them into two small logs with sharp points at the end. Make sure you put tension on the skin of the dough. You can watch the video to see how I make these.
- Put these, seam down, on the cookie sheet, and cover them with a towel. Let them rise in a warm spot for 20 minutes.
Third Rise of the Dough
- After the second rise, put the dough, seam up, on your floured work surface, and flatten it.Fold the two sides inward, so the dough forms a trapezoid shape. Roll the dough into a tight loaf, from the small side of the trapezoid towards the large side. You can watch the video to see how I do this exactly.Repeat this for the second piece of dough.
- Place the two loaves on your cookie sheet (seam down), and brush the top with water.Do not cover them, and let them rise in a warm spot for 60 minutes
Applying the Rice Paste
- After the bread has risen a third time, get the rice paste from where it was rising. Stir it through, and add some water if it has gotten too thick.
- Spread a layer of the rice paste on the top of the breads with your hand. Make sure it's just on the top, and not too thick. Once it's on, do not mess with it. If any of the paste is on the sides of the bread, remove it.Let the bread rest on the counter, while you preheat the oven.
Baking the Bread
- Put your oven rack in the middle of the oven, and a second rack below it.Add a cookie sheet with edges on the lower rack. You'll fill this with water when you add the bread to the oven.
- Preheat the oven (non-convection) to 240ºC (465F).
- Once the oven is preheated, put the breads on the middle rack, and add water to the cookie sheet on the lower rack. Close the oven quickly, so the steam stays in the oven. Immediately lower the temperature to 220ºC (425F).Let the bread bake for 10 minutes.
- Lower the temperature of the oven to 200ºC (390C) and bake the bread for another 10-15 minutes, or until the crust is nice and golden brown.
i tried this recipe to the gram and found that the dutch crunch did not end up a paste, and was a very thick dough. i ended up following a different recipe for the topping, as i had already started the bread that called for 75g of rice flour, 150g of water,15g sugar, 15g oil, and 7g of yeast, and it was the consistency shown in the video. The bread itself was perfect and very easy to make! thanks for sharing, i love dutch crunch and never see it here in colorado!
Thanks for the feedback! Let me double check the recipe, to make sure the measurements I posted are correct.
Yes, I had the same experience. Followed the rice topping to the gram but it was thick and dry— not at all close to slurry. Just guessed on adjustments until it finally resembled what was intended.
I sometimes make this without the “tijger paste” on top, as a basic sandwich bread.
I also had a problem with the topping, but I just thinned it out a big with water to get the right consistency. I would like to use your bread recipe again, but make small bread rolls. Any suggestions for time and oven temps?
I will update the recipe…
Here is my recipe for small bread rolls: https://www.toineskitchen.com/recipes/witte-bolletjes
Loved it! I also added a bit more water for the rice paste but the video demonstration was really clear and helpful with getting the right consistency. Thanks, this is my new favourite bread recipe 🙂